Testing: How to actually write tests?
Why Write Tests?
In the early period of developers’ careers or in companies where there are no proper workflows, many of us got away (many still do) with not writing tests. We resort to testing our code manually, i.e., opening the page, filling out the form, and checking for potential problems.
So every time we make any changes or add new features to our app, there’s always anxiety on release day, hoping and praying that it doesn’t break.
The more features an app has, the more hectic it becomes to maintain it.
The best way to get rid of this anxiety for once and all is to write tests.
But how do I start?
Have you spent hours watching your favorite YouTube teacher take you through each step from the installation process of Laravel and PHPUnit to configuring the database and showing how to write your first test, but at the end you still find yourself not able to write any tests on your own?
Well, in this article, I’ll give you the exact blueprint that will not only help you write your first test, but also help you write tests rapidly and efficiently.
So before I give you the blueprint, let’s make some assumptions. First, you have a basic knowledge of Laravel, MVC, and CRUD. Secondly, I’m assuming you have a basic knowledge of PHPUnit and how to install it. If you don’t, I’ll recommend you check out these two amazing series on testing in Laravel by Jeffrey Way: Testing Laravel and Testing Jargon. Third, you have already setup everything you need to start writing tests. So you should get green if you run:
php artisan testSo let’s get started.
The Blueprint
So we know that every controller has at least one of these methods: index, show, create, store, edit, update, delete. We write our tests based on these actions. Let’s take a look at the blueprint for writing tests for the index and show methods:
public function test_it_shows_all_the_posts()
{
    // Given in our database, we have 5 posts
    // When we visit the posts page
    // Then we should see a paginated list of all the posts
}

public function test_it_shows_a_single_post()
{
    // Given in our database, we have a post with the title "This is a test post"
    // When we visit the post page
    // Then we should see the post with the title "This is a test post"
}
What you see above is called the Given-When-Then pattern or Arrange, Act, Assert. This allows you to structure your tests. It also makes it easier for you to read and understand your tests.
Down To The Business
Now let’s actually write the test. We’ll start by creating a new test class. We’ll call it PostControllerTest.php inside the tests/Features folder. We’ll also create a new method inside the class called test_it_shows_all_the_posts and this method represents the index method in our controller.
You can also use the artisan command to create the test class for you. Just run php artisan make:test PostControllerTest.
Remove the test_example method and replace it with the test_it_shows_all_the_posts method.
<?php

namespace Tests\Feature;

use \Illuminate\Foundation\Testing\RefreshDatabase;
use \Tests\TestCase;

class PostControllerTest extends TestCase
{
    use RefreshDatabase;

    public function test_it_shows_all_the_posts()
    {
        $posts = \App\Models\Post::factory()->count(5)->create();

        $this->get('/posts')
            ->assertStatus(200)
            ->assertSee('Posts')
            ->assertSee($posts[0]->title)
            ->assertSee($posts[1]->title)
            ->assertSee($posts[2]->title)
            ->assertSee($posts[3]->title)
            ->assertSee($posts[4]->title);
    }
}
To run the test, we’ll run the command php artisan test and we should see something like this:
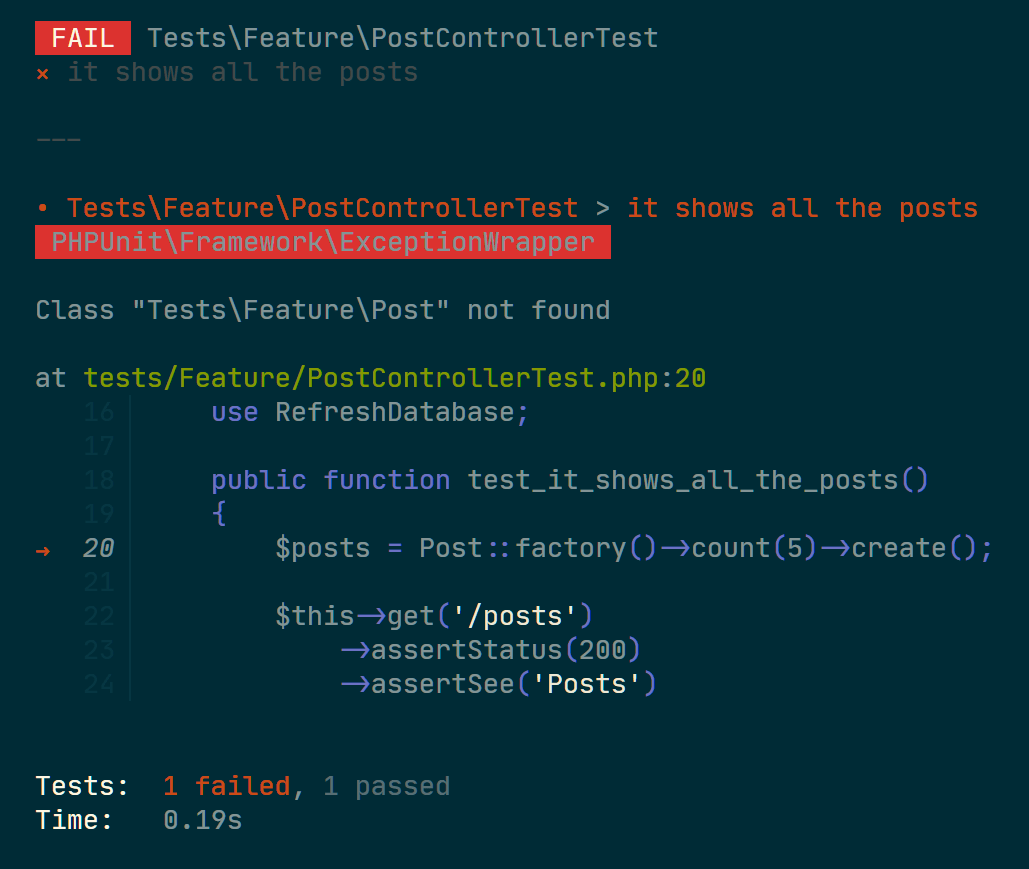
In TDD, we use a term called “Red-Green-Refactor”. This means that we write a test that fails, then we write the code. So now we’re going to write the code that will make the test pass.
From the error message, we can see that the test is failing because the model Post doesn’t exist. So let’s create it. We’ll create a new model called Post. We’ll also create the migration, seeder, factory, policy, resource controller, and form request classes for the Post model. And the best way to do this is by running the command php artisan make:model Post -a.
Though we won’t be using the policy so well remove app/Policies/PostPolicy.php.
Before we move on, let’s add some columns to the posts table via the migration file. Open the database/migrations/NNNN_NN_NN_NNNNNN_create_posts_table and replace the up method with the following:
    public function up()
    {
        Schema::create('posts', function (Blueprint $table) {
            $table->id();
            $table->string('title');
            $table->string('slug')->unique();
            $table->longText('content');
            $table->string('image')->nullable();
            $table->string('status')->default('Draft');
            $table->timestamps();
            $table->softDeletes();
        });
    }
Now, let’s take a look at the PostFactory.php file. We’ll replace the definition method with the following:
public function definition()
{
return [
'title' => $this->faker->sentence,
'slug' => $this->faker->slug,
'content' => $this->faker->paragraph,
'image' => $this->faker->imageUrl(1920,720, 'cats', true),
'status' => $this->faker->randomElement([
'Draft', 'Publish', 'Unlisted',
]),
];
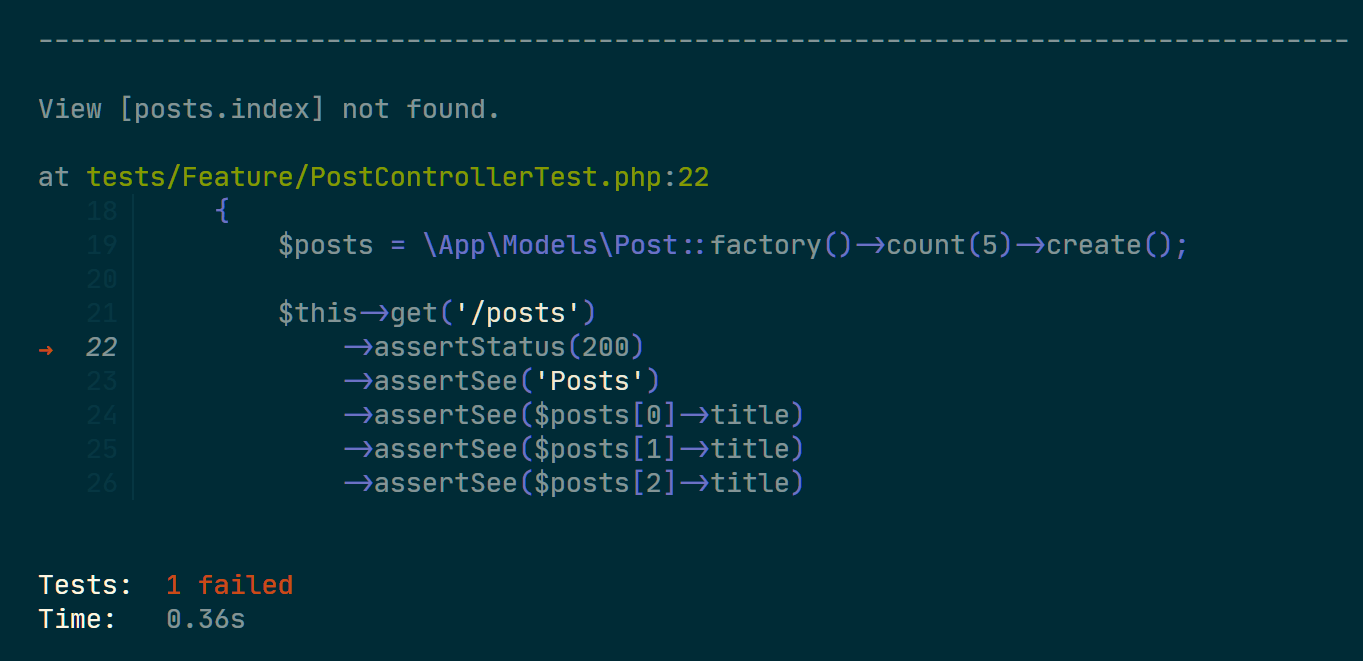
}Now let’s run the test again. We should see something like this.

So at line 22, we are expecting to see the page with an unordered list five posts, but we’re getting 404 because we haven’t created the route for the posts yet.
Now we’re going to write the code that will make the test pass. We’ll edit our routes/web.php file and add the following:
\Illuminate\Support\Facades\Route::resource('posts', \App\Http\Controllers\PostController::class);now run php artisan test again and you get this:
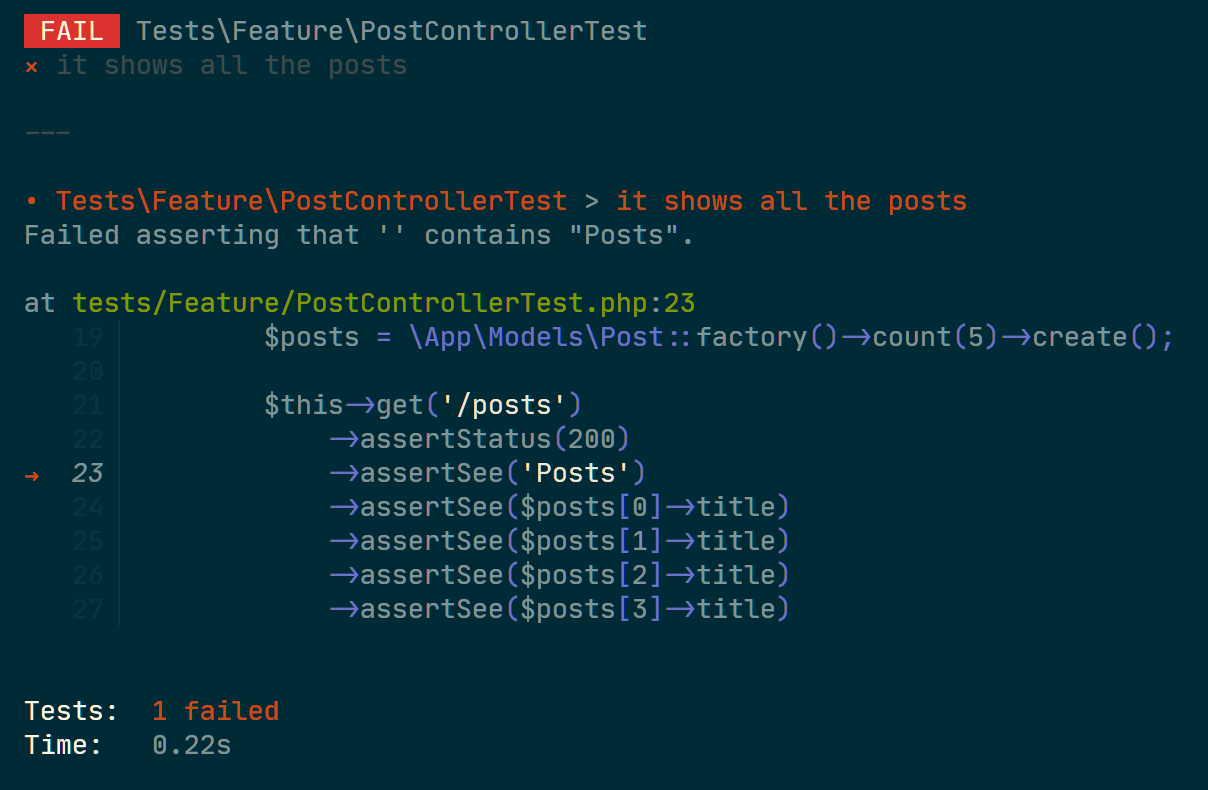
If you notice, in the previous screenshot the error is at line number 22, but this time it is at 23, so our previous test has passed. Now let’s see what’s going on at line 23?
On line 23, we’re making sure we see the text Posts when we open the page, but get nothing. Since, when we call /posts, it calls the index action of our PostController controller class, and we haven’t touched the controller, yet after we generated our model.
Here’s how our controller looks like as generated by artisan command:
<?php

namespace App\Http\Controllers;

use \AppHttpRequests\StorePostRequest;
use \App\Http\Requests\UpdatePostRequest;
use \App\Models\Post;

class PostController extends Controller
{
    public function index()
    {
        //
    }

    public function create()
    {
        //
    }

    public function store(StorePostRequest $request)
    {
        //
    }

    public function show(Post $post)
    {
        //
    }

    public function edit(Post $post)
    {
        //
    }

    public function update(UpdatePostRequest $request, Post $post)
    {
        //
    }

    public function destroy(Post $post)
    {
        //
    }
}
Let’s focus on the index method. Right now we can see that it’s doing nothing. That’s why the response from the test was returning an empty string:
    public function index()
    {
        //
    }
We know what when the posts page is loaded it should display a list of posts. So here’s how we do it:
    public function index()
    {
        $posts = \App\Models\Post::paginate();

        return view('posts.index', compact('posts'));
    }
Now let’s run the test again. We should see something like this:
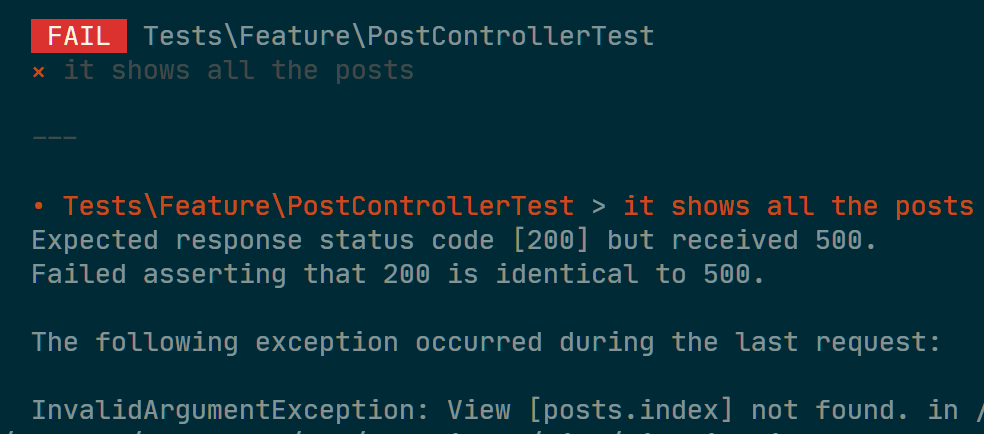
So we’re getting an error because we don’t have a view for the posts.index page. So let’s create it. We’ll create a new file called index.blade.php in the resources/views/posts directory. And we’ll add the following code:
@extends('layouts.app')

@section('content')
    <div class="p-8">
        <h1 class="text-6xl my-6">Posts</h1>
        <ul>
            @foreach($posts as $post)
                <li class="my-5">
                    <a class="text-3xl hover:underline hover:text-blue-500"
                       href="{{route('posts.show', $post->id)}}">{{ $post->title }}</a>
                </li>
            @endforeach
        </ul>
    </div>
@endsection
Also, create a new file called app.blade.php in the resources/views/layouts directory. And add the following code:
<!DOCTYPE html>
<html lang="{{ str_replace('_', '-', app()->getLocale()) }}">
<head>
    <meta charset="utf-8">
    <meta name="viewport" content="width=device-width, initial-scale=1">

    <title>Laravel</title>
    <script src="https://cdn.tailwindcss.com"></script>

    <!-- Fonts -->
    <link href="https://fonts.bunny.net/css2?family=Nunito:wght@400;600;700&display=swap" rel="stylesheet">
    <style>
        body {
            font-family: 'Nunito', sans-serif;
        }
    </style>
</head>
<body class="antialiased">
<div class="md:w-9/12 w-full mx-auto bg-blue-200">
    <main>
        <div>
            <h1 class="text-7xl text-center py-6"><a href="/posts">My Blog</a></h1>
        </div>
        <div>
            @yield('content')
        </div>
    </main>
</div>
</body>
</html>
Now let’s run the test again. We should see something like this:
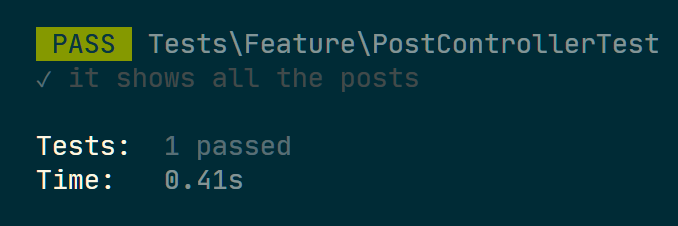
And we have a passing test. Now let’s add a test for the show action. We’ll add the following code to the PostTest.php file:
    public function test_it_shows_a_single_post()
    {
        $post = \App\Models\Post::factory()
            ->create(['title' => 'This is a test post']);

        $response = $this->get(route('posts.show', $post->id));

        $response->assertStatus(200);
        $response->assertSee($post->title);
    }
Run the test again. We should see something like this:
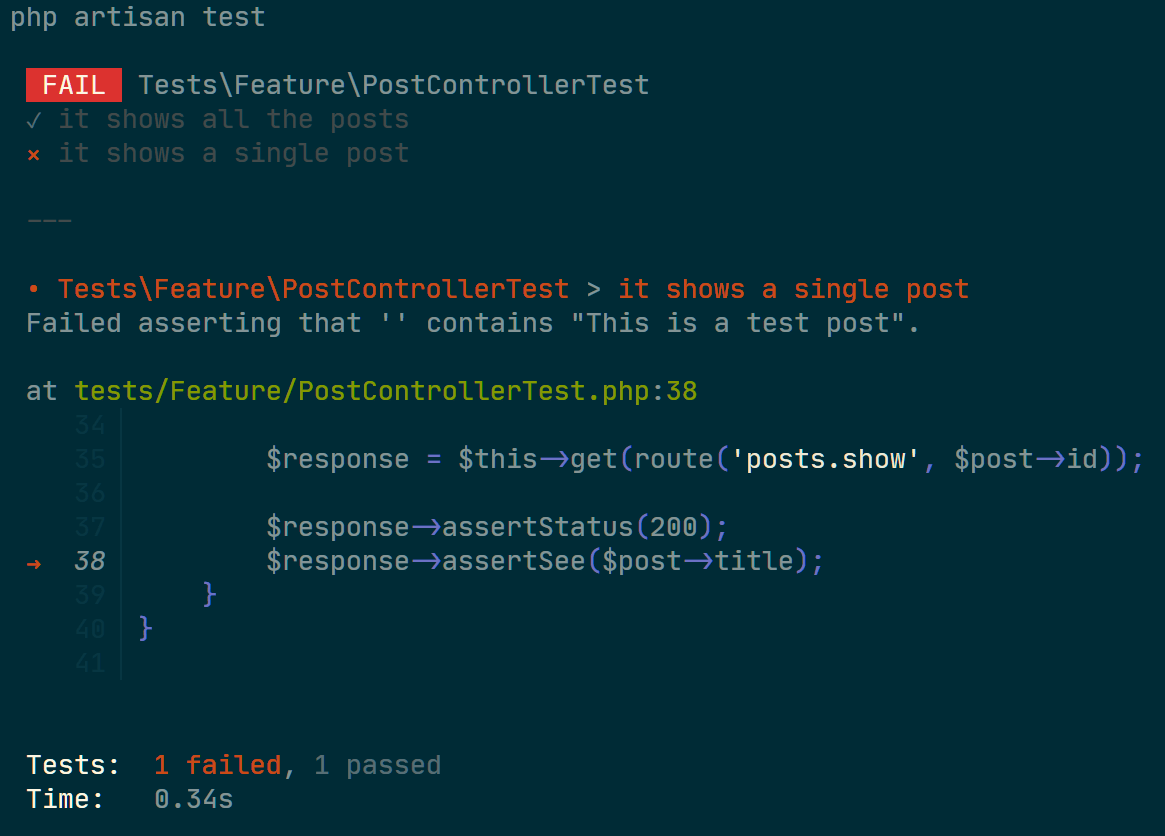
So we’re getting an error because we don’t have a view for the posts.show page. So let’s create it. We’ll create a file called show.blade.php in the resources/views/posts directory. And we’ll add the following code:
@extends('layouts.app')

@section('content')
    <div class="p-8">
        <div class="text-center">
            <p>{{$post->created_at->format('M d, Y')}}</p>
            <h1 class="text-4xl mb-6">{{$post->title}}</h1>
        </div>

        <img src="{{$post->image}}" alt="{{$post->title}}" class="w-full"/>

        <div class="my-5">
            {{$post->content}}
        </div>
    </div>
@endsection
and edit the PostController.php file and add the following code:
    public function show(Post $post)
    {
        return view('posts.show', compact('post'));
    }
Now let’s run the test again. We should see something like this:
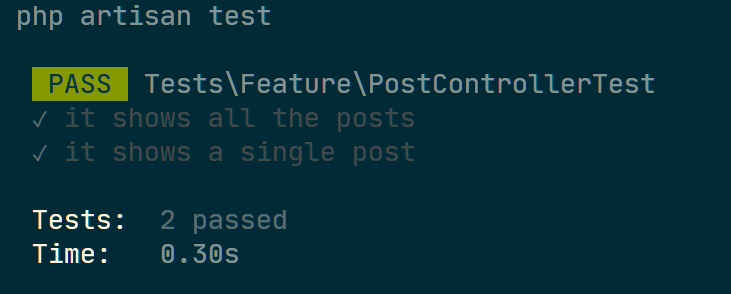
And we have another passing test!
Hopefully, you now have an idea of how to write tests for your Laravel application.
Now it’s your turn to write some tests for your application.
Soure Code
Here’s the GitHub repo for the project:
Comments